
- 2.1 Option 1: Starting from the Pear Deck Website
- 2.2 Option 2: Starting from Google Slides
- 2.3 Option 3: Starting from PowerPoint Online
- 2.4 Accessing Your Account Information:
- 2.5 For Administrators:
Embarking on the journey of interactive teaching starts with setting up your Pear Deck account. Let’s walk through the process step by step:
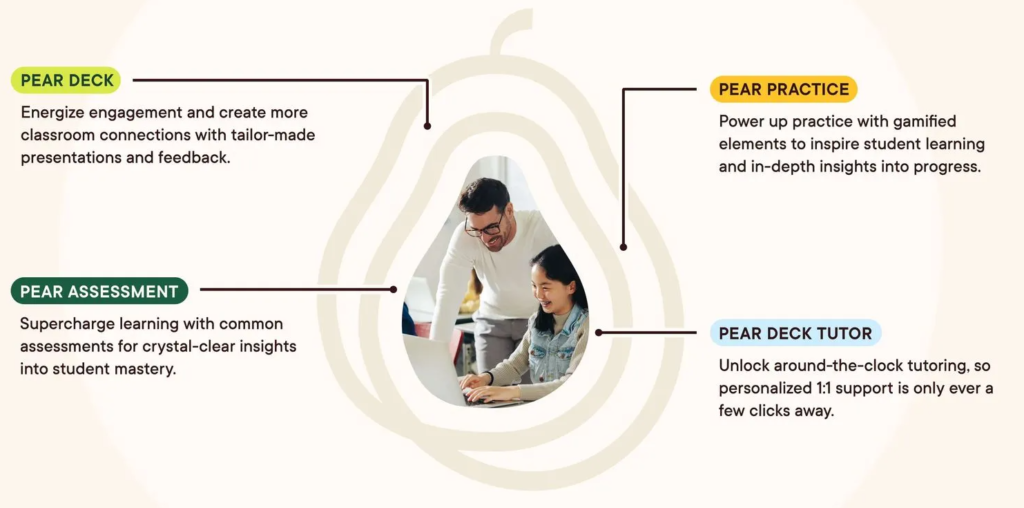
Account Requirements for Pear Deck:
To create and present with Pear Deck, you’ll need a Google or Microsoft Office 365 account. Here’s what you need to know:
- You can use any personal, educational, or business email account.
- Your Pear Deck files will be automatically saved in your Google Drive or OneDrive.
- If you wish to track participant interactions, students can sign in with their Google or Microsoft Office 365 accounts at joinpd.com. Alternatively, you can keep logins anonymous by adjusting your account settings.
- Students don’t need a Pear Deck account to participate in sessions.
Getting Started: How To Create a Pear Deck Account
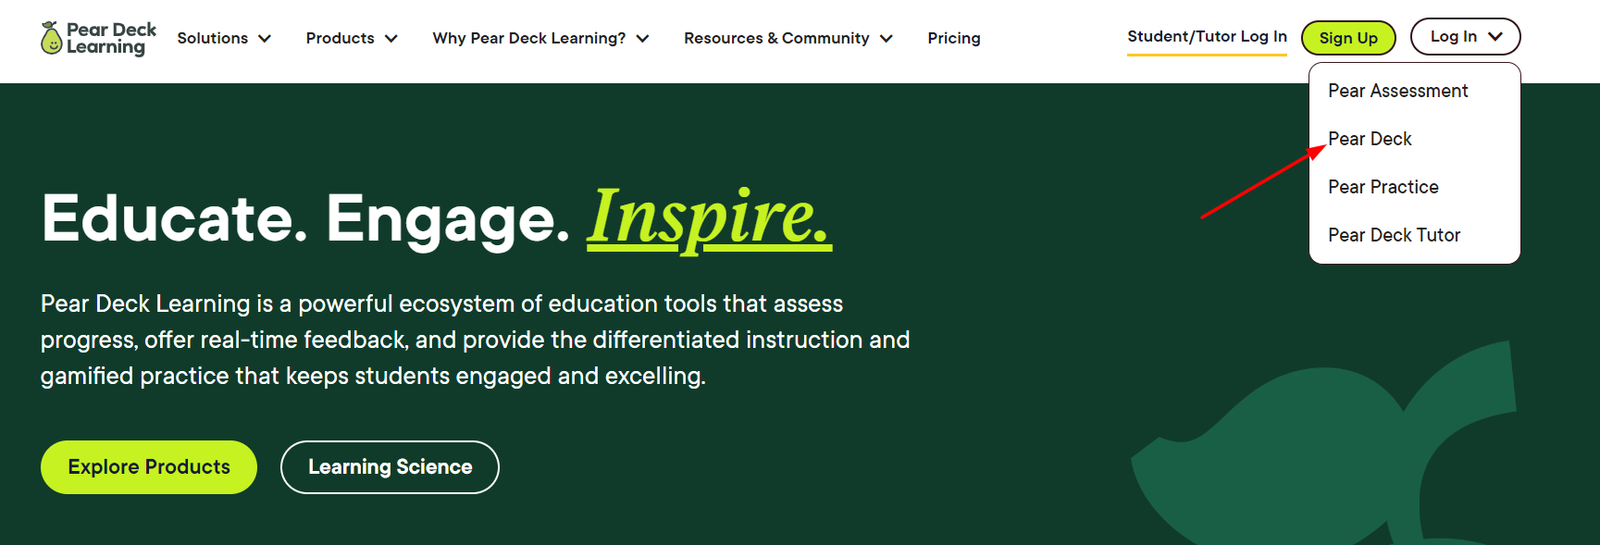
Option 1: Starting from the Pear Deck Website
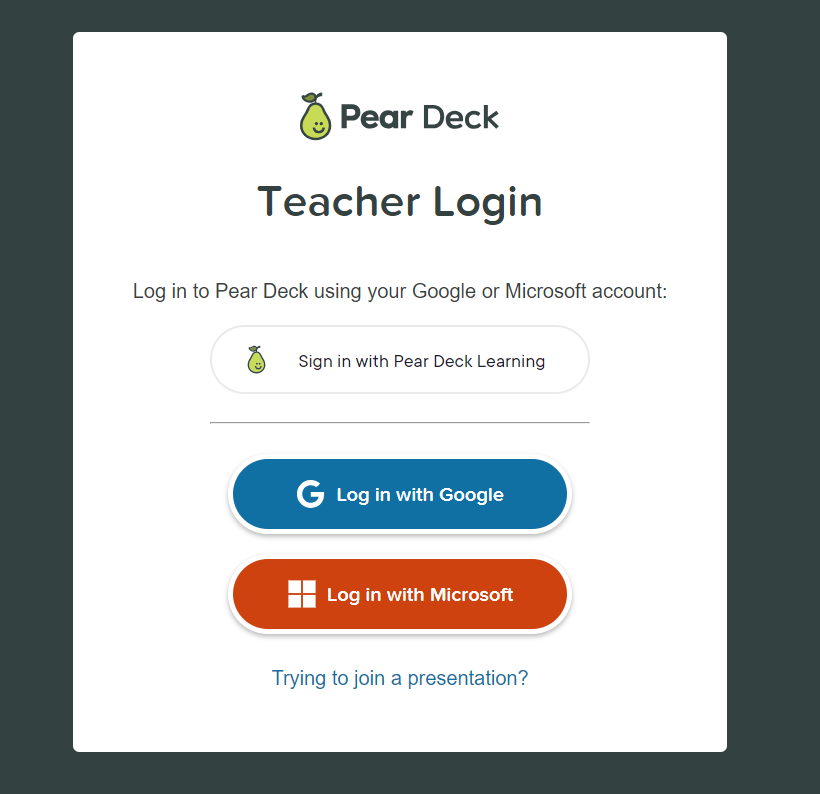
- Visit peardeck.com and select Pear Deck from the Log In dropdown menu.

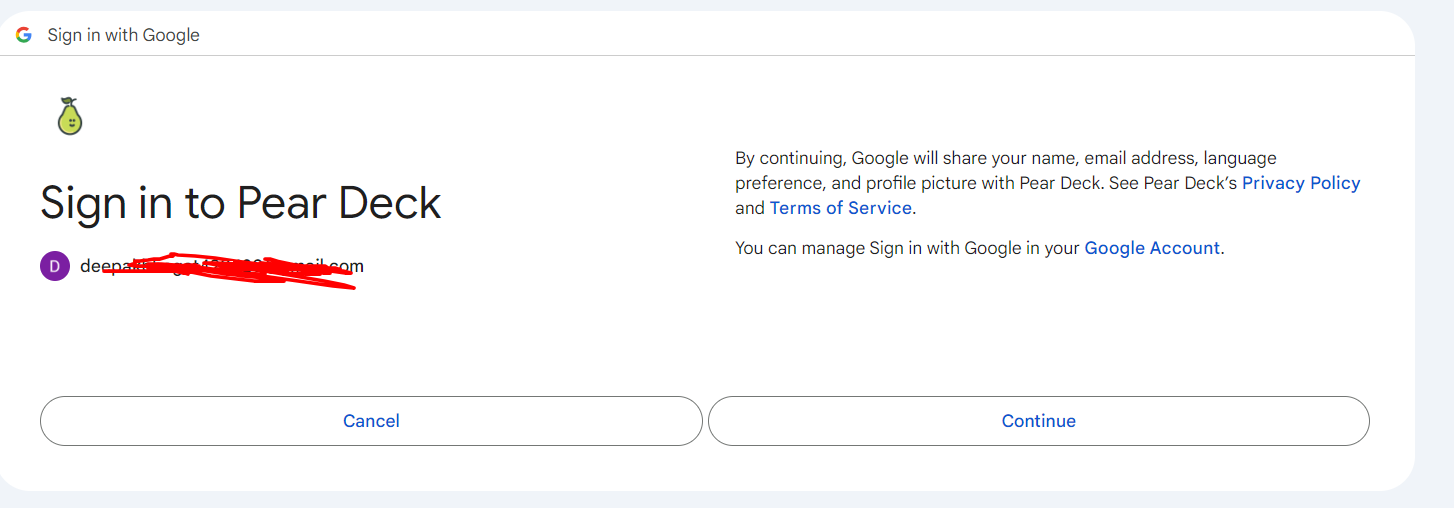
- Choose your preferred account type (Google or Microsoft).

- Grant Pear Deck access to your Google Drive or OneDrive and complete the setup by providing necessary details like your postal code and school information.

- Enjoy a 30-day trial of Pear Deck Premium without providing payment information.

Option 2: Starting from Google Slides
- Open any Google Slides presentation.
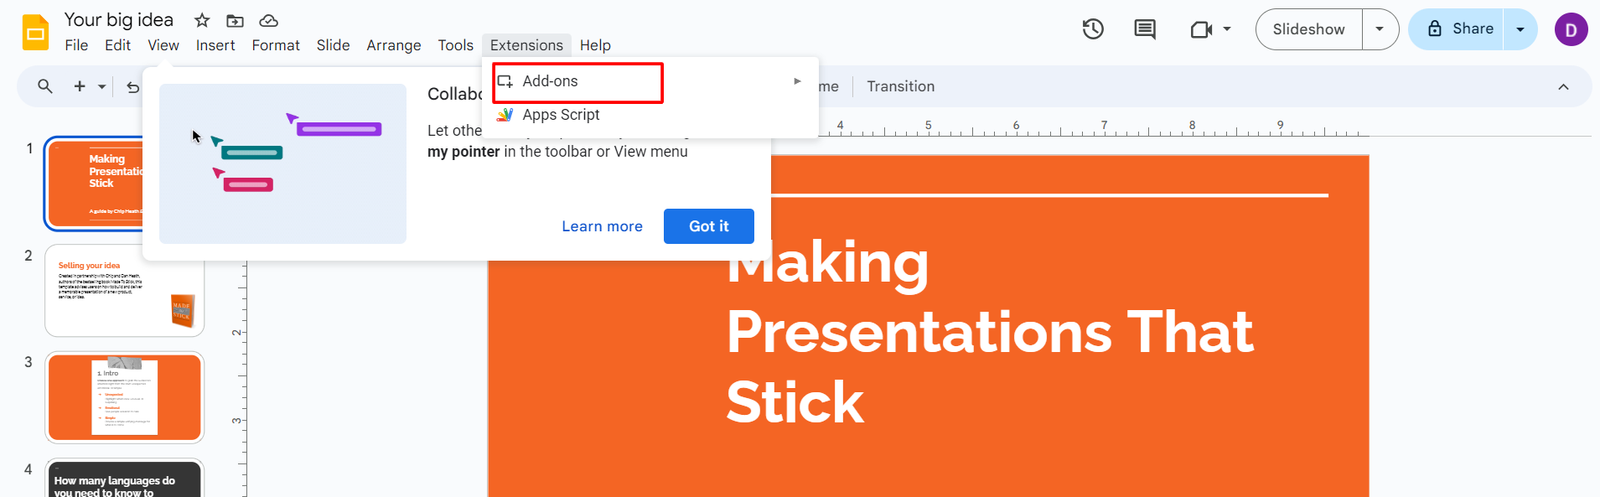

- Navigate to Extensions/Add-ons and search for the Pear Deck Add-on in the G Suite Marketplace.


- Install the Pear Deck Add-on and grant necessary permissions.
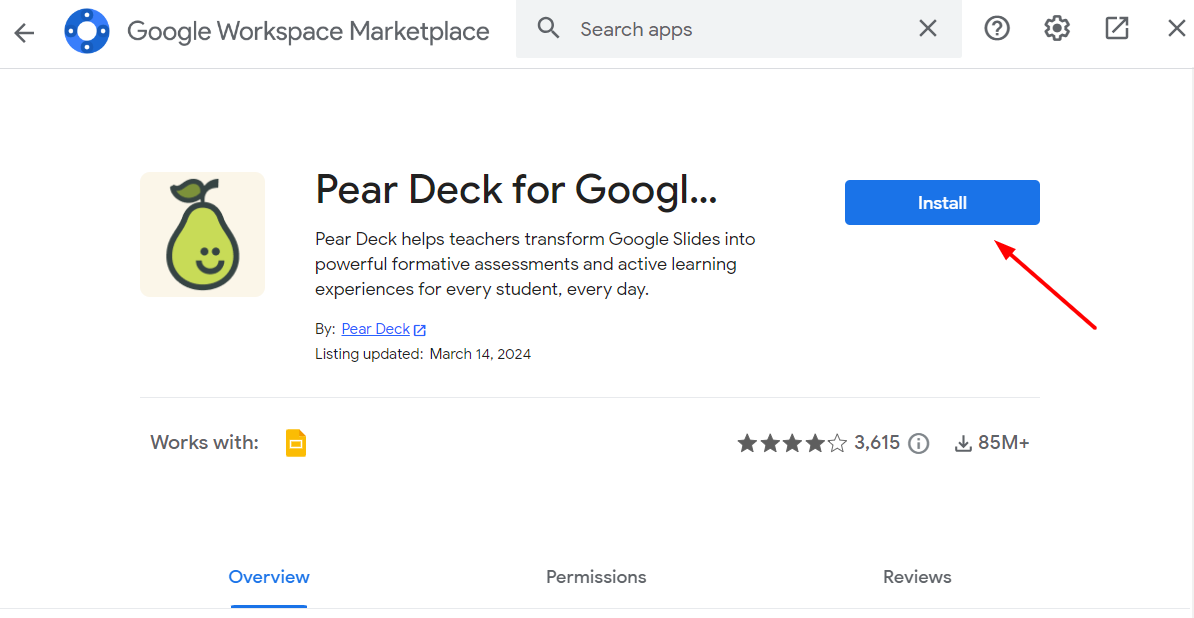

- Complete the account setup process as prompted.
Option 3: Starting from PowerPoint Online
- Open any PowerPoint Online presentation.
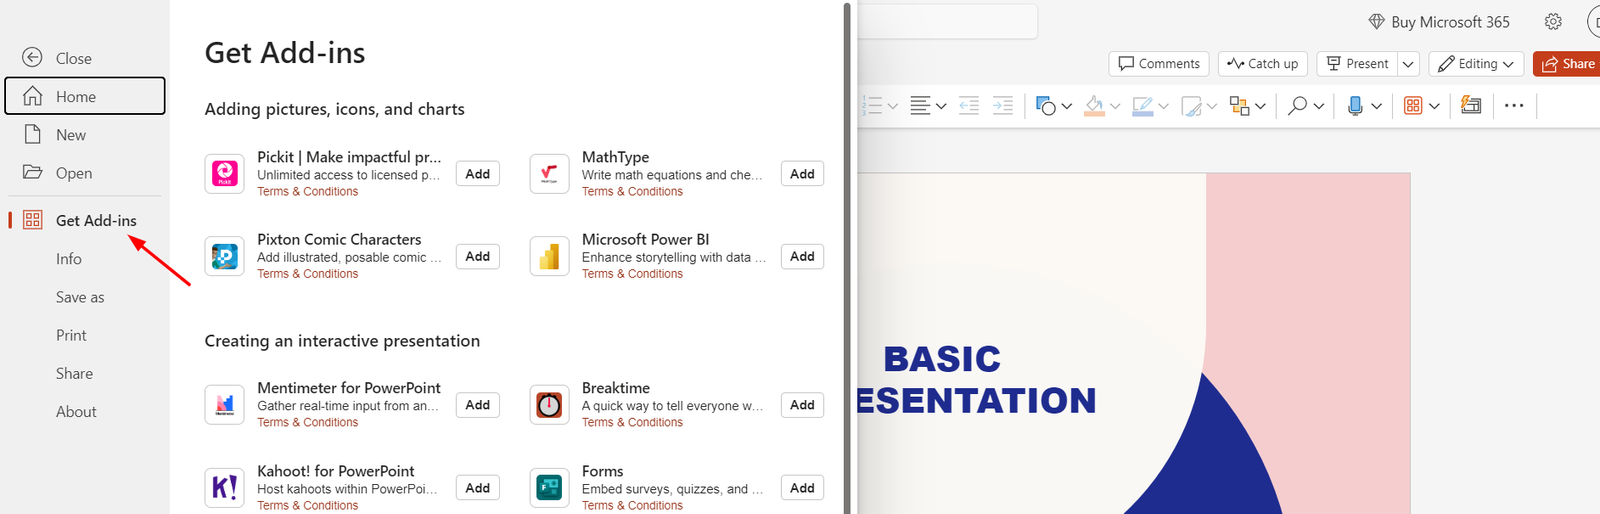

- Access Add-ins from the File menu and search for Pear Deck.
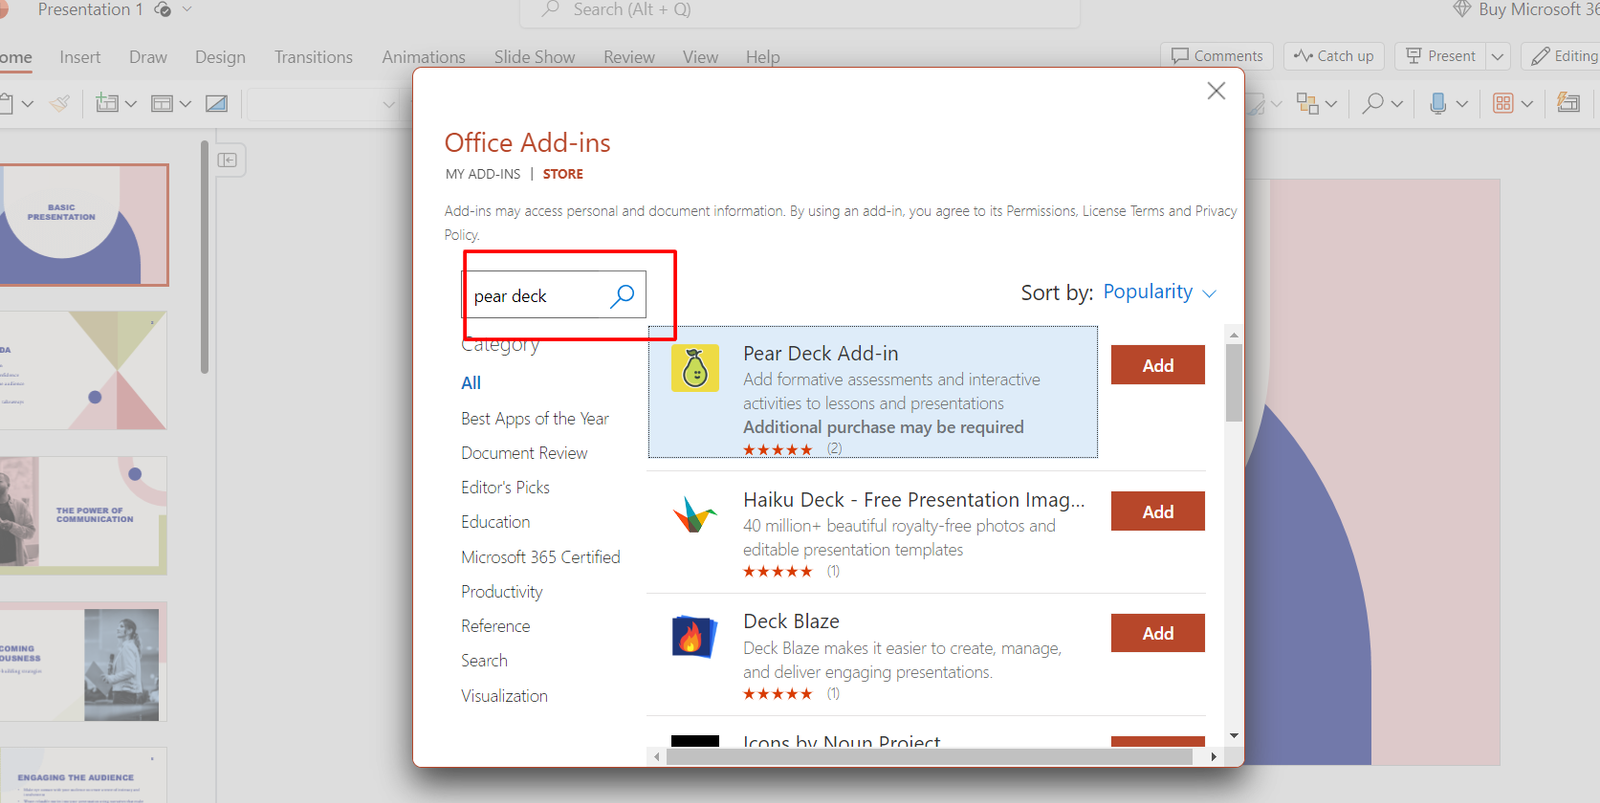

- Install the Pear Deck Add-in and follow the prompts to set up your account.


- Once installed, access Pear Deck from the Home tab.
Accessing Your Account Information:
Your Pear Deck Home is accessible at https://app.peardeck.com/home. From here, you can manage your presentations, view recent files, access Sessions, and adjust account settings.
For Administrators:
If you’re an administrator looking to implement Pear Deck in your institution, refer to specific guides for enabling Pear Deck in Google Admin Console or deploying it in Microsoft Office 365 Admin Center.
FAQs:
- Students don’t need Pear Deck accounts to participate in sessions.
- Your Pear Deck account is tied to your email login and the associated platform (Google or Microsoft).
- If your school isn’t listed during setup, you can manually enter its name or opt for a personal/professional account.
- Pear Deck requires access to your Drive to store and access presentation files securely.
By following these steps, you’ll be equipped to create engaging and interactive lessons with Pear Deck, enhancing student learning experiences.